How to Resize Images for Your Website
Websites nowadays contains hundreds if not thousands of images, so resizing images in bulk for your website is essential. Many online services and WordPress plugins provide such service, but it might be limiting to some extent. Using JavaScript you can achieve a very good results with minimal effort and almost for free!.
We will be using Sharp Js Library which is an great library for optimizing, resizing , It also has many other features that will help you to improve your images with ease. In this article, we will focus on resizing images using Sharp.
Sharp requires Node.js to be installed on your Operating System, which you can download below. ( I recommend downloading and installing the stable version for your operating system ).
Sharp is a high-speed Node.js module to convert large images in standard formats to smaller, web-friendly JPEG, PNG, WebP, GIF, and AVIF images of varying dimensions.
Using Sharp to resize your images is very easy to do, and we will go through the steps to resize your images in bulk for your website.
1- Install Sharp Library
The first step is installing Sharp using npm or yarn
Open your command line terminal in this folder, -I use Gitbash– then run the following command
NPM
If you have npm installed then run this line.
npm i sharpYarn
Or you can replace npm install with yarn add if you have yarn in your system.
yarn add sharpIt should install the required packages within moments.
Script
Now we should create a new file that will contain our code to resize images, Create a file name index.js and add the following code.
const sharp = require("sharp");
const fs = require("fs");
const path = require("path");
The packages are Sharp Library(sharp) which we just installed earlier, Filesystem (fs), and path (path) packages which should already.
Now let’s create a folder that will contain our original images we will name (images). and another folder for outputting resized images we will name (output).
The packages and folders should look something like this
Images Resizing Structure
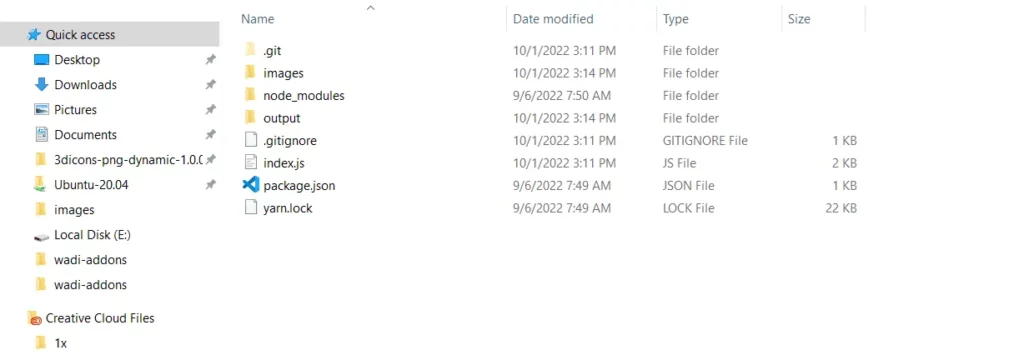
You can clone the structure and the code from the GitHub repo Sharp Images Optimization
We will add the original images that we will resize to the (images) folder.
const directoryName = "images";

const fileNames = fs.readdirSync(directoryName);
directoryName variable is the images folder name, and filesNames variable we get to loop through for resizing using Sharp.
fileNames.forEach((file) => {

  const fileFormat = getExtension(file);
  let sh = sharp("./images/" + file);

  if( 'jpg' == fileFormat ) {
    sh.jpeg({
      quality: 80,
      progressive: true,
    }).resize(
      {
        fit:  sharp.fit.contain,
        width: 900,
      }
    )
  }
});

function getExtension(filename) {
  let ext = path.extname(filename || "").split(".");

  return ext[ext.length - 1];
}
Now we will loop through all images that are jpg formatted, and set those images’ quality to 80 (percent) you can set the number higher or lower. you can read more about available options for image optimization (Output Images).
Resizing Images use the method resize, and we will keep images same dimensions, width is set to 900 (PX), this will make the images’ width to 900 Pixels and the height will be resized accordingly with the same dimensions.
You can check more options from (Resizing Images) Options.
Add similar logic for WebP and PNG formatted images
fileNames.forEach((file) => {

  const fileFormat = getExtension(file);
  let sh = sharp("./images/" + file);

  if( 'jpg' == fileFormat ) {
    sh.jpeg({
      quality: 80,
      progressive: true,
    }).resize(
      {
        fit:  sharp.fit.contain,
        width: 900,
      }
    )
  } else if ('png' === fileFormat) {
    sh.png({
      quality: 80,
      progressive: true,
    }).resize(
      {
        fit:  sharp.fit.contain,
        width: 900,
      }
    )
  } else if('webp' === fileFormat){
    sh.webp({lossless:true, quality: 80, alphaQuality: 100, force: true}).resize(
        {fit: sharp.fit.contain, width: 900}
      )
  }
});

function getExtension(filename) {
  let ext = path.extname(filename || "").split(".");

  return ext[ext.length - 1];
}
The final code in index.js file should be
// Packages
const sharp = require("sharp");
const fs = require("fs");
const path = require("path");

// Original Images directory
const directoryName = "images";

// Get file names
const fileNames = fs.readdirSync(directoryName);

// Loop through images
fileNames.forEach((file) => {

  // Get image format (extension)
  const fileFormat = getExtension(file);

  console.log("fileFormat", fileFormat)
  if (fileFormat === "svg") {
    console.log("SVGs are not processed in this script at the moment");
    return;
  }
  let sh = sharp("./images/" + file);

  if( 'jpg' == fileFormat ) {
    sh.jpeg({
      quality: 80,
      progressive: true,
    }).resize(
      {
        fit:  sharp.fit.contain,
        width: 900,
      }
    )
  } else if ('png' === fileFormat) {
    sh.png({
      quality: 80,
      progressive: true,
    }).resize(
      {
        fit:  sharp.fit.contain,
        width: 900,
      }
    )
  } else if('webp' === fileFormat){
    sh.webp({lossless:true, quality: 80, alphaQuality: 100, force: true}).resize(
        {fit: sharp.fit.contain, width: 900}
      )
  }


  console.log('output/' + file);
  let fileNameWOExtension = file.replace(/\.[^/.]+$/, "");

  console.log(fileNameWOExtension);


  sh.toFile('output/' + `${file}`, function (err, info) {
    // console.log(info);
    if(err) {
      console.log(err + "Error occurred while optimization process")
    }
  })
});

// Get Image Extension
function getExtension(filename) {
  let ext = path.extname(filename || "").split(".");

  return ext[ext.length - 1];
}
After finishing the code and organizing our folders Let’s add our images and test resizing images
In images folder we have about 25 images free from pexels, images varying in size so we will use Sharp to resize those images making their width 900 Pixels and the height will resize to the same aspect ratio.
Run the following command in the Visual Studio Code terminal (or Git bash or any other terminal to run your commands).
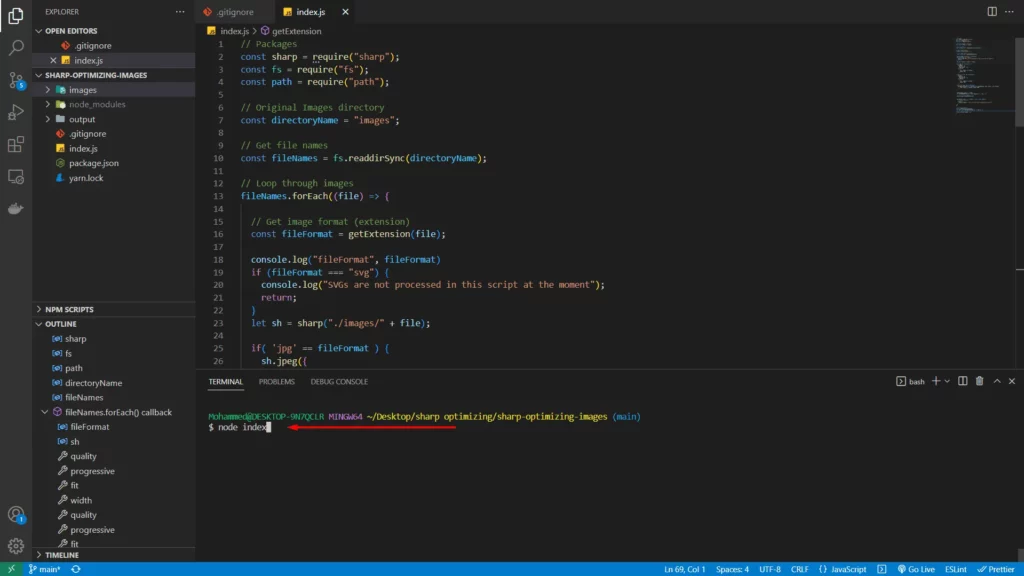
node index.js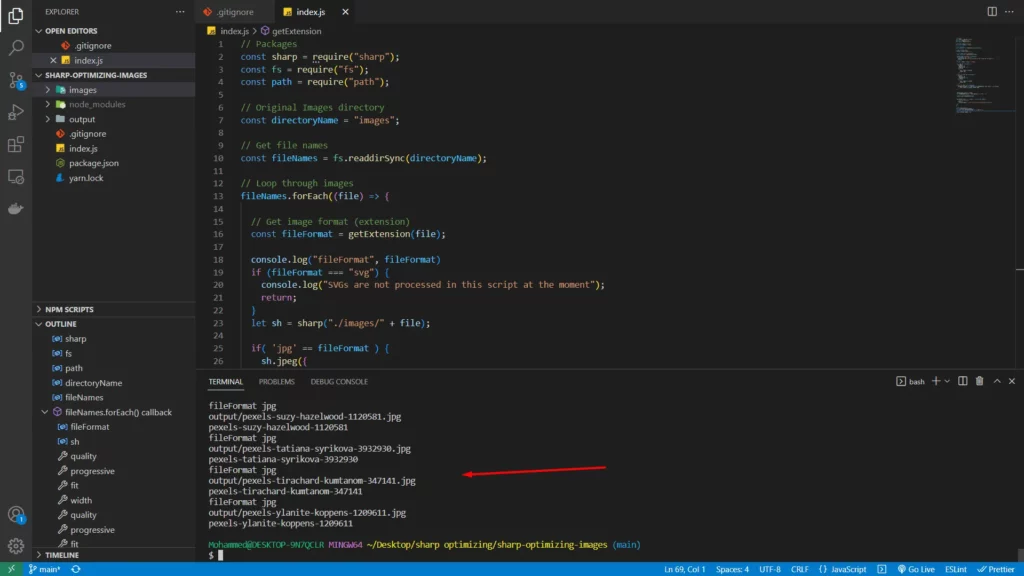
You should see the console logs appear in the terminal while resizing images. The time of resizing images depends on the size and quantity of the images. So 25 images didn’t take more than 2 seconds.
So, let’s see images before and after resizing dimensions
Before Resizing
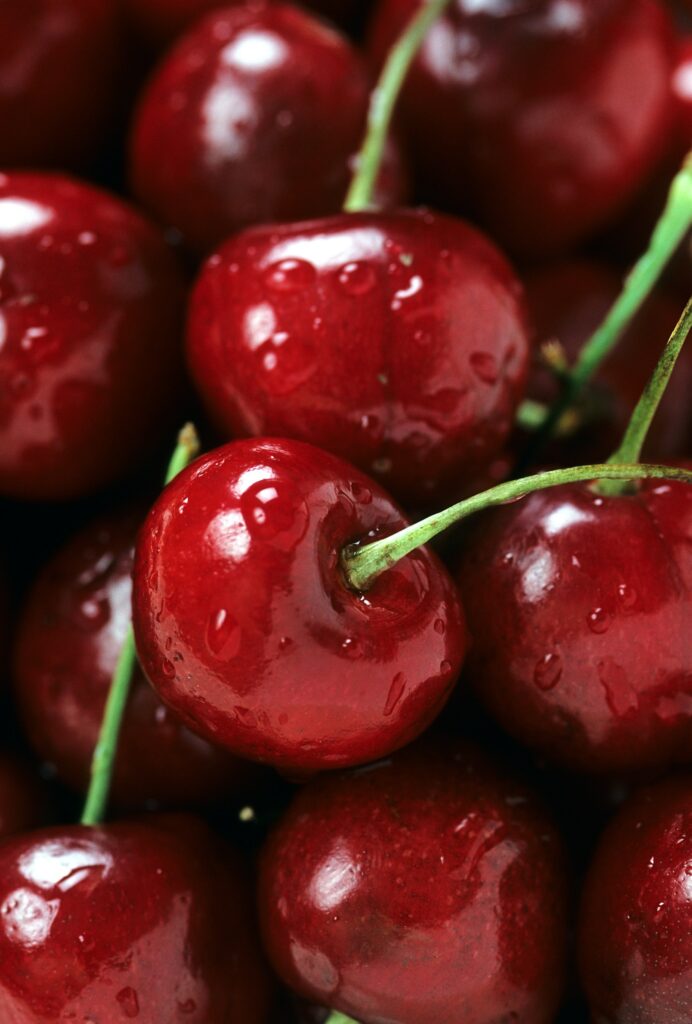
After Resizing
Conclusion
Resizing images using Sharp doesn’t require much work after the initial setup. you can resize your images very fast and with many custom options available.
Learn how to optimize images for your website to be production ready (How to Optimize Images for Your Website).